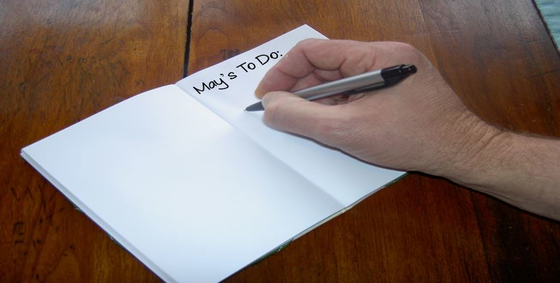
May’s Garden To-Do List

May_to_do

For your Vegetable and Fruit Garden:

  • Cover the garden beds that will be used for vegetables with black plastic to kill weeds and warm the soil for the weeks leading up to the time of planting. This method is also needed when you are also using the no-till method.
  • Sow more rows of lettuce, carrots and beets. Here’s a hint – sow smaller amounts every month to spread out the supply overtime rather than all at once.
  • Plant a set of cabbage seedlings to mature after your March and April plants mature for a steady harvest.
  • Plant your Brussels sprouts, kale and tomatoes at the beginning of the month and wait until the end to plant the pepper plants. Plant the seeds of warm weather vegetables now – that’s your beans, melons, cucumbers, squash and pumpkins. Your Corn should be planted at the end of the month or left to the beginning of June.
  • Control your insect problem by hand-picking and covering your row covers or by using less harmful insecticides.
  • Don’t forget to plant your herb seedlings!

For your Flower Beds:

  • Do not forget to continue laying down newspaper and mulching your garden beds as you clear them of weeds. This task must be done every month!
  • Plant your tender plants like geraniums, fuchsias, begonias and impatiens. Plant your dahlias and gladiolus tubers mid-month.
  • Prune the shrubs that need it after bloom.
  • Fertilize your roses and flowering shrubs that need it! If you compost, you should have enough for most flowering plants, but a few like hydrangeas and rhododendrons may benefit from additional feeding.


Other Tasks:

  • You can still plant a new lawn this month, but after this you should wait for fall. For those with existing lawns, mow, mow and mow!
  • Spot weed lawns and fertilize early if you didn’t do it in April.
  • Lightly sheer evergreens and hedges to your preferred shape.
  • Test your watering systems. Replace any hoses and sprinklers that need it.
  • If you started your seeds indoors such as peppers, tomatoes, basil and other warm weather crops, you’ll need to harden-off gradually over a period of a week to allow the plants more and more hours outside until they are able to stay out overnight.

How to Install Stone Edge Landscape Edging

The STONE EDGE Decorative edging is a surface installed edging. That means no digging is needed! The edging system gives the appearance of a natural stone barrier and provides a beautiful means for neatly defining the boundaries between your lawn and mulch beds. This mechanism allows the components both to hold firmly together and to flex in any direction, giving you the freedom to fashion the edging system into an infinite number of shapes around your landscaping. Here’s how you install your own Stone Edge Landscape Edging!


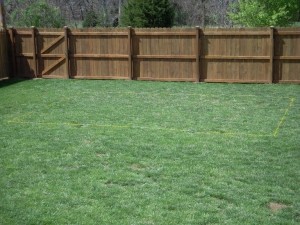
Step One: Mark out where you want your edging to go!


playground_1

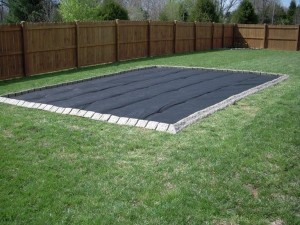
Step Two: Lay down garden tarp to keep your stone (or mulch or topsoil, etc.) from disappearing into the ground below.

playground_2

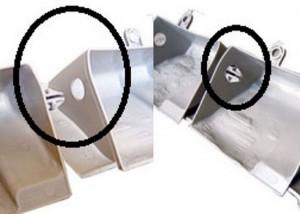
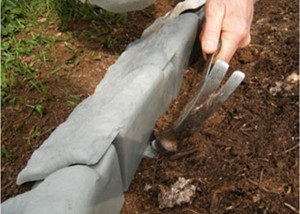
Step Three: Snap each piece of edging to the next piece.

installation

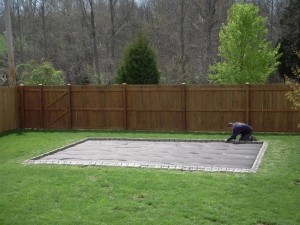
Step Four: Lay all the pieces that you have snapped together in the garden area where you want the edging.

playground_3

Step Five: Secure the edging to the ground by inserting the included spikes into the eyelet hole on the back of each STONE EDGE piece.

installation2

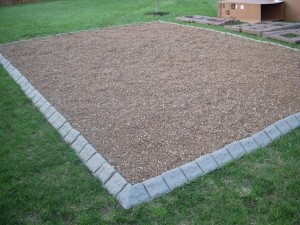
Step Six: Add the stone (or mulch, topsoil, etc.) inside the edging.

d71d296c767b3d45bccbf6f580e84e9f

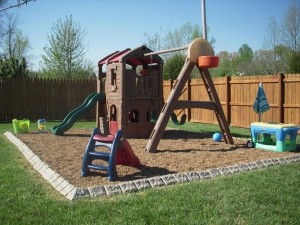
Step Seven: Add your playground equipment, plants, firepits, etc.

playground_6

Step Eight: Enjoy your newly edged playground (or garden) and lawn!

playground_7

April Showers Bring May Flowers

april_showers_bring_may_flowers

Well it’s May and the flowers are starting to show up! The grass is green and the yard is…. Well, it needs some work after this long winter season! Here are four chores that will help brighten your yard and garden!


  1. Mulching: There are tons of materials that can be sued to mulch. Mulching is done to prevent weeds from growing but it also insulates roots and help the soil underneath retain water. With the right type of mulch can also nourish plants and can also add some character to your garden design.
  2. Plant Annuals: If you want your garden to have beautiful colourful flowers throughout the summer, than annuals are the most reliable way to get just that. By planting them now, they will have a long lasting effect! Planting Hack: If you purchase one colour and stick with that colour for the year you can create a seamless colour story throughout your whole garden.
  3. Plant Summer Bulbs and Tubers: Dahlias, gladiolas, and other summer blooming bulbs should be planted as soon as possible. The sooner they are planted, the longer you will have to enjoy them. Remember, at the end of the season, be sure to dig them up for winter storage (unless of course you live in an area where they can stay year round)!
  4. Weed now, relax later: The longer you wait before you pull the weeds the harder it will be to get rid of them. Pull the baby weeds while they are easy to remove. Not only will this remove the weeds before they can anchor themselves, but it also disrupts them from going to seed and creating more weeds!


What are some other chores you do in May?

14 Ways to Use Ornamental Grass

Ornamental_Grass

Ornamental grass can be used for many different things when it comes to landscaping. Today we are going to touch on the top 14 uses!


  1. Add Privacy: Tall grasses bunched together can create a perfect solution for screening! For the best effects, chose tall species such as big bluestem, moor grass, or ravennagrass. Keep in mind that when you cut back ornamental grasses in the early spring, you won’t have a screen for a month or two while your grasses are growing back.
  2. Create Colourful Containers: Ornamental grass comes in many different shapes, colours, and sizes making them perfect for a container garden. To great the most dynamic effect with grasses then look for the unexpected! Try doing contrasting colours, textures, shapes and sizes.
  3. Add texture to beds and borders: Ornamental grasses can add an unique texture to your landscape. Maximize your effect by planting many different grasses together. Soft grasses such as fountaingrass look great with other plants that have a bold texture. Grasses that are more upright go well with smaller, more mounded plants.
  4. Soften Hardscaping: Hardscapes such as walls and paving are a great place to use ornamental grasses to soften their looks and keep them from feeling icy and unappealing. Planting grasses around a swimming pool are a great idea because they do not attract bees.
  5. Dress up Decks and Patios: Ornamental grasses aren’t just for beds and borders of your landscape. Grow them in containers and add a little character to your decks and patios. Use annual or tender grasses so you do not have to replace them in the spring.
  6. Plant a Knot Garden: Herbs and tidy hedges such as boxwood make great geometric knot gardens. Tight, mounding grasses work best in knot gardens. Avoid using grasses that are too loose and open. They will make the knot garden look and feel messy.
  7. Add a Garden Accent: Grasses can be added to create a great accent plant for beds and borders. Tuck grasses around your landscape and by using the same grass in several different parts of garden will help tie your garden together.
  8. Cover your ground: Low-growing or mid-size grasses are great at ground covering. They do a great job at smothering weeds while at the same time creating an interesting texture for your landscape. Dense habitual grasses like mounding grasses often make better ground covers.
  9. Create Edging: Edge your garden beds with a tiny life of neat grasses. Edging with grass works best if you plant them close together (closer than usual) so the grasses grow together in one line.
  10. Make it all season: Grasses really stand out at the end of the season as most annuals and perennials look worn. Not to mention the fact that they have great fall colour!
  11. Two is always better than one: Plant your grasses in pairs to maximize the effect. To create a more formal feel, plant the grasses in symmetrical patterns.
  12. Attract Wildlife: Grasses will attract different wildlife like birds. They can use the grass for making nests, finding shelter and many species will also eat the grass seeds.
  13. Decorate your Vegetable Garden: Ornamental grasses are not only for your landscape. Try tucking them into your vegetable garden. Clump-forming grasses are the best choice for vegetable gardens. Just be careful not to plant grasses that will become more weed-like as they spread.
  14. Create some Garden Art: Your favourite ornamental grasses will complement a sculpture or pot within your garden. This type of design will look great all year long. Play with different plant and art combinations to find what works best for you.


Do you have any other ideas on how to use ornamental grasses in your landscape? Share them in the comments below!

7 Tips for Landscaping Beginners

7tips

Whether you are completely new to landscaping, or you have some knowledge and are looking to refresh an outdoor area, here are seven useful tips to help you get started!

1. It can seem overwhelming if you’ve never tackled a landscaping project before, but the first step is to make a list of your needs and wants. Do you need a play space? Do you need to grow those vegetables? Beginning with a plan is the best way to ensure you stay on track!

2. Study the sun and wind patterns. If you decide you want to place a patio on the west side of the house, you should ensure the sun doesn’t hit during the afternoon hours, otherwise summer dinners on the patio may be quite hot. Or perhaps you want to install a brand new fire pit. Make sure the wind doesn’t blow in a certain direction to put out that cozy fire every time!

3. Live with it for a while. Don’t jump to any conclusions before you observe and enjoy what is already there. There may be certain areas around your yard that you later will come to appreciate.

4. Start small! Landscaping is a process that takes time. Despite what those shows tell you, it doesn’t happen overnight! Plus, you will have more time to enjoy your new projects, one by one.

5. Work around a focal point. Any good garden design has a focal point or series of focal points, and it’s an easy principle to put in place in landscape design for beginners. There may be a beautiful sculpture or perhaps a stunning tree or plant that would make a great focal point for landscaping.

6. Focus on scale and pacing. You want to ensure that you repeat some elements (such as colour or shape) for cohesiveness.

7. Finally, be open to change! Perhaps that one landscaping job you did a year ago no longer looks good to you. Patience is the key to a beginner’s landscaping design, and change is always a good thing!

You can start by ordering your products from YardProduct.com!

The perfect DIY Project for Spring

diyspringstarite

Adding Sta-Rite Edging to any outdoor project can create very defining lines and define an area. It is easy to install and can be ordered directly from yardproduct.com for free shipping and delivery to your home anywhere in North America!

The idea of installing it yourself may seem like a daunting task, but this DIY project is simple and will save you money!

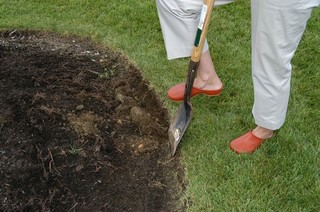
1. To begin, you need to dig a trench where you are going to put your edging.

2. Next, you will want to lay out a garden tarp so your mulch doesn’t disappear into the soil below.

3. Once you purchase and receive your Sta-Rite edging from yardproduct.com, decide if you want your edging to stay straight or curve.

4. If you decide on a curve, simply cut the one side as shown below:

5. Once done, your Sta-Rite Edging will fit together just like a puzzle and you can connect the pieces together until you have the correct length.

6. Next, place the edging along the edge of the dug out trench.

7. You will need to hammer the stakes through the edging and into the ground so the edging stays in place.

8. Now you’re going to need to remove the extra tarp along the edges of the trench.

9. Make sure to trim the edges with a pair of scissors!

10. Add the mulch, gravel or topsoil (your choice) and fill in the trench evenly.

11. Don’t forget to make sure the Mulch (or gravel, soil, etc.) covers all the way to the sides!

12.  Last but not least, sit back and enjoy your beautiful newly edged garden and lawn!

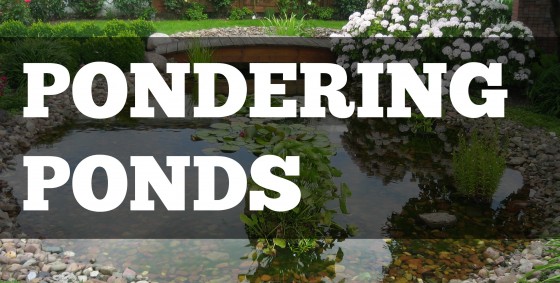
Pondering Ponds

Pondering Ponds

Every landscape needs a “Wow Factor”. (Click to Tweet). What says more, “Wow” than water? A backyard pond can turn any bland back or front yard into a yard others would envy. If done right, it can also be very little maintenance. In order for it to be so, you need to do things right the first time.

BENEFITS of a Pond

How many times have you heard, “Shut the door, we’re not cooling the earth” while you’re A/C is on? Well, what if we told you that you can have a natural Outdoor Air Conditioner. It’s true, a pond actually does just that. As the water from the pond evaporates in the heat, it removes heat from the surrounding area. Owners who live in an area where it’s very hot and the humidity is low can attest that a pond does indeed create a cooler atmosphere.

A running water pond and/or waterfall can help to eliminate noise using white noise. If you’re constantly hearing traffic or the kids playing next door and all you want to do is relax than maybe a natural sound mask is perfect for you. Even if you don’t need to cover other noises, running water creates soothing and relaxing white noise. Aim the running water to whatever you’d want most whether that being a deck or a particular window.

A pond can be the perfect place for wildlife. Depending on how you keep it up and plan it, different animals, birds and insects may seek refuge especially when it’s particularly hot or cold outside. If you’re worried about mosquitoes, don’t be. Mosquitoes prefer warm, stagnant water so make sure it’s a running water pond and you’ll have nothing to worry about.

TIPS for Ponds

There’s no wrong spot for a pond. Really, you could place it anywhere in your yard and it’d be great. There are water plants for both shady and sunny locations. However, if you want the best spot, our advice to you is to pick a spot where it receives morning sun and afternoon shade. With the morning sun, you can pick the best plants for your pond and surrounding area. By having a shady afternoon, you eliminate risk of overheating water that could harm any fish or plants. You also don’t want an algae problem.

Keep it roomy to start. We all love a bridge over a pond or the feel of a jungle with high plants and trees surrounding it but, you are also going to want workspace around your pond. There should be at least two feet around the pond so that you can access it at any point or any reason.

Perhaps using flat rocks to border your pond is more your style than plants. The benefits of this is that when you mow your lawn you can mow right on top of the flat stones rather than trying to maneuver in and out of plants and rocks.

We hope that with this list of benefits and tips you’ll turn your pondering into a pond.
When to Prune: Part 2

when to prune again

Since last week, you must think you’re a pro pruner and you might be. Just so you can master the skill, we have a few more tips and specifics when it comes to pruning different and certain plants. (Click To Tweet)

Roses
Roses are the perfect flower for almost any occasion. The roses that are one hit wonders are the tree climbers and garden roses; these are spring bloomers and blooms once. The perfect time to prune? Right after they finish blooming.
Do you have some that return in the same year or season? Repeat bloomers such as modern shrub roses or hybrid teas are to be pruned to the shape of the plant and to remove the damaged as it comes.

Deciduous Shade Trees
When winter comes, these trees become dormant. During this time, it’s the perfect time to prune. You won’t harm the tree in anyway or spread disease while it is dormant.

Deciduous Fruit Trees
You want to create space in this tree for sun to be absorbed. You want to prune in winter when it is dormant. You want the best quality over the most quantity.

Evergreens (Fir, spruce, cypress, etc)
Ho Ho Ho, the classic Christmas tree. The needle type trees should be pruned in the early growing time. You don’t want to cut any wood that does not contain any of the green needles. If done, it may not grow back for you.
Natural Holiday decorations? This tree is perfect for snipping a few in the winter for your home. It won’t affect the growth of the tree.

Pruning Tips

  • Don’t prune any newborn trees or trees that are newly planted. Wait at least a year before clipping away.
  • Cut as close to the branching point, this will avoid any stubs on the tree.
  • Dip the tool you’re using to prune with rubbing alcohol to eliminate the spread of any disease the plant may have.

When to Prune

Hydrangea_Mdm_E_Moul_LG2

Prune is not just a food (Click to Tweet).

Eating prunes helps to digest food and get rid of the “bad” in our bodies; the process of pruning is to get rid of the “bad” off plants. As soon as you notice anything dead, diseased or damaged you’re going to want to get rid of it. When pieces of a plant are broken, insects, pests and, harmful diseases are attracted to said plant.

Spring
Anything that blooms in the early spring should be pruned right after they’re done blooming. Try to avoid pruning in the winter. Pruning in the winter can damaged it for the following spring.

Summer
For the flowers, trees, and shrubs that grow in the summer you will want to prune them in the winter while they are dormant. These plants you can cut to the core in early spring or late winter as well and it will not harm the bloom in summer.

Hydrangeas
You will need to prune any type of Hydrangea early summer. If pruned before then you will be destroying the buds before they can bloom.

Hedges
Here are a few tips for growing hedges

  • Refrain from shearing six weeks before frost. Optimal time is in the early growth. Following this will give you the best green foliage your plant can offer.
  • For shrubs that are formed into hedges, you will want the top narrower than the bottom. This will keep the top from casting a shadow and hindering growth.
  • Growing a privacy hedge? Let them grow and only prune if you need to.


Gardening Tip!
Save time and your back by using a pole pruner where the head rotates.

Landscaping from the Start

Landscaping from the Start - Feb 28, 2015

Perhaps, the home of your dreams is perfect on the inside but the outside could definitely use some work. You can’t wait to start chopping, building and planting to show all your neighbours that what’s on the outside is mirrored on the inside. Why not turn ordinary into extraordinary the right way, the first time.

You’re all moved in, it’s new, and it’s exciting. Your mind is bursting with ideas and creativity. Breathe. Take some time and live in your new home. Get to know it. Get used to it. You need to know how the rain, snow, wind, melting ice, seasons affect your home. Clean up the yard, pull some weeds and of course purchase some of the landscaping tools you’ll need but, don’t do anything too permanent. Step one, is wait at least a year.

Now you’ll need to figure out how the sun, shade and weather all affect the different areas of your yard. This is super important when you’re figuring out which flowers to plant where.

Research. Just as you’re doing now. You’re going to need to know what you want. What does annual mean? How about Deciduous? Learn the vocabulary when it comes to landscaping; it will save you a headache.

Taking it step by step will make things easy for you and your yard (Click to Tweet). You want it appealing to the eye and not over cluttered. By taking it slow, you’ll save yourself time and money as well.

The key point to all landscapes is the grass. Grass is something that needs to be done first. It’s the base, the canvas if you will, of every landscape.
Plan, plan, plan. Landscape needs time, preparation and lots of thought. Be patient on everything and keep in mind that trees will grow. Plant the trees away, not too close to the home. As time goes on the roots may grow and damage the foundation.

Planning of small flowers can make a big difference as well. For example, planting a tulip behind a sunflower is poor planning. Spending extra time researching and preparing now will reward you later on.

Start by getting your landscape edging today at YardProduct.com.

Have any more suggestions for beginners?
Let us know in the comments below; we’d love to hear from you.