8 Reasons to use Landscape Edging

This week we deiced to focus on the importance of landscape edging! So here they are… Eight reasons why you should use landscape edging!

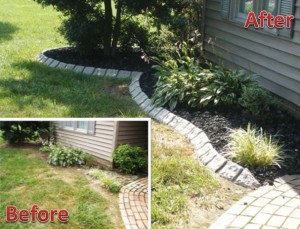
  1. Landscape Edging creates very defining lines between flower beds and other areas. Check out this before and after photo!before & After
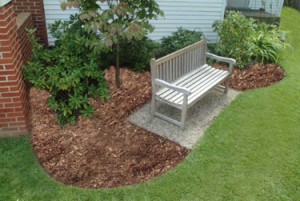
  2. Although Landscape edging can be most visible between a lawn and the adjoining garden, it can also define a flower border, area around a tree and shrub bed (see image below) or the transition from a patio to the surrounding garden. AluminumEdging8
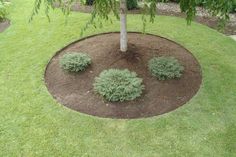
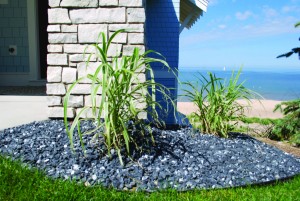
  3. Landscape edging really emphasizes the lines of beds and leads the eye to the next garden focal point! (Click to Tweet)AluminumEdging9
  4. Landscape edging keeps turf grass from spreading into surrounding garden areas!before & After2
  5. Landscape edging also keeps soil and mulch from the garden from spilling onto the lawn or pathways!scape11
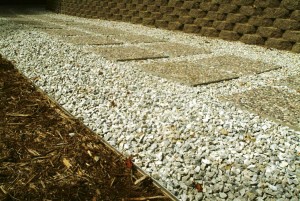
  6. Landscape edging also contains stones and gravel in defined walkways!scape7
  7. Taller landscape edging, like our Decorative Stone Edging can direct garden traffic and keep people on defined paths or areas like this playground!playground_6
  8. Lastly, Landscape edging can keep people out of areas where they shouldn’t be, such as planting beds!Landscape_10

Purchase your landscape edging today from YardProduct.com!

And for a short time only, use the PROMO code “SAVE15″ to get $15 off of a $100 purchase!

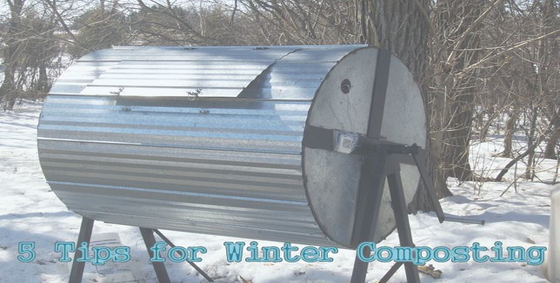
5 Tips for Winter Composting

tipsforwintercomposting(4)

Getting anxious to start composting again once the spring weather finally settles in? Why wait? Here are five tips for Winter Composting! (Click to Tweet)


Keep it warm and insulated.

You can purchase insulated tumblers for winter composting that will help keep the cold air out so the bacteria can stay active. If you don’t want to spend money for a tumbler, there are still ways to achieve this. If you have a bin that can be moved, move it just inside a garbage can to help shield it from the brisk air. If you cannot move it, think of ways that you can protect it. This is a very important factor to consider when starting your compost. If you have a compost pile that that is not contained in a bin or structure, consider covering it with a tarp, or building a structure to protect it. You can make a simple structure out of scrap wood, bricks or anything that will keep the cool wind out. Worried about snow? Don’t be! Snow can actually help insulate from the dip in temperatures.


Keep it active.

Be sure to keep the bacteria growing by continuously adding to your compost. This does not have to be only organic material. In the fall, rake up some leaves to add over the duration of the winter. Adding a little bit every time you turn your compost and aerate it can help keep things active. You will also need to be sure you are balancing out what bacteria it needs to thrive on a good mix of brown and green material. Brown material is anything that produces carbon (ie. leaves). Green material is anything that produces nitrogen (i.e. kitchen scraps).


Small is better.

When adding new compost material, be sure to keep the material small. The cold weather will slow down your composting, so crunch the leaves you add to make smaller particles, and when your adding new kitchen scraps be sure to chop them finer as well.


Less is more.

Don’t turn over your pile as frequently; tumbling your bin can actually add cold air into your compost that will damage the frail system inside. When the weather is warm you can go back to turning the material with every addition.


Keep it Moist.

Be sure to keep your compost moist, but do not overwater. The dry winter air can leave your compost struggling to hold moisture, but only add the water in small quantities and do not do it when the weather is extremely frigid. It can cause the moisture inside to freeze and put an end to your composting process.


Do you have any other tips for winter composting? Be sure to share them in the comments below!

February Gardening and Landscaping Tips

feb gardening landscaping tips

Despite the massive amounts of snow we have received within the last week, today we will be talking about some gardening tips for the month of February. It is never too late to start preparing for spring and lightening your to do list for the warmer weather! (Click to Tweet)

Prepare Yourself
Do inventory and order seeds:
Be sure to check your seed supplies. The earlier you order your seeds the better the selection will be! Do not forget to plan for your fall plantings as well! 
Inspect and maintain your tools:
Get ahead of the game by sharpening your cutting and digging tools now. For any sharpening jobs that you cannot do, take your tools to a local hardware store that offers blade sharpening. Make sure your power tools are running as they should be.
Review your gardening supplies:
There are other items to think about other than seeds and plants! Purchase your potting soil, weed cloth, mulch, plant markers,
frost blankets, and other supplies that may be running low.
Toss the trash:
Inspect any tubers, roots, or corms you stored for winter. Compost any that are growing mold or going soft. 
 
Prepare Your Yard
  • Pick a warm day to prune your landscape plants. Remove any dead or damaged branches. Thin any plants with heavily branched interiors.
  • Do not prune shrubs or trees that flower in the spring until after they bloom. If you prune them to early, you will be cutting off the blossoms!
  • Do not prune oaks and walnuts until July to help avoid wilt disease.
  • Some trees will bleed sap profusely if pruned in the spring. It doesn’t harm the tree, but it will make a mess. Wait to prune maple, birch and dogwood trees until early summer.

Six Plants to Plant Now to Repel Mosquitoes Later!

In this cold weather I am sure you haven’t thought much about those pesky Mosquitoes that find you in the warmer months. But to prevent this from happening later this year, you will have to plan ahead… or should I say plant ahead.

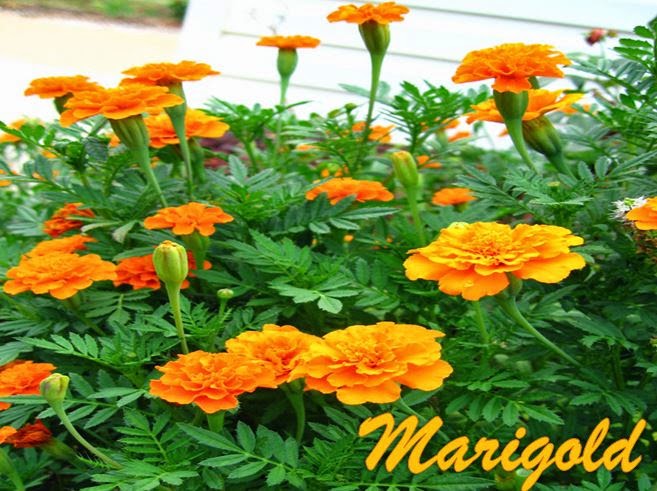
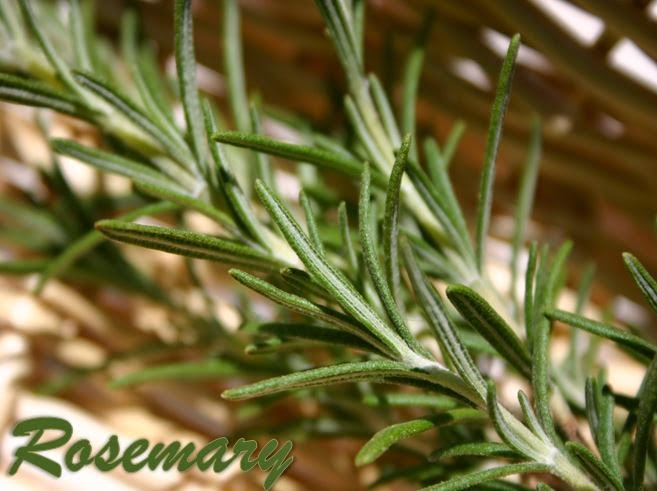
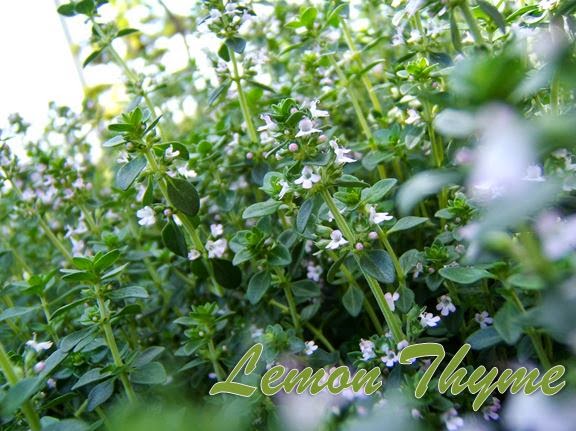
By planting the following plants in container plants or in your garden, you will repel mosquitoes! (Click to Tweet)


Marigold


rosemary


Lemon Thyme


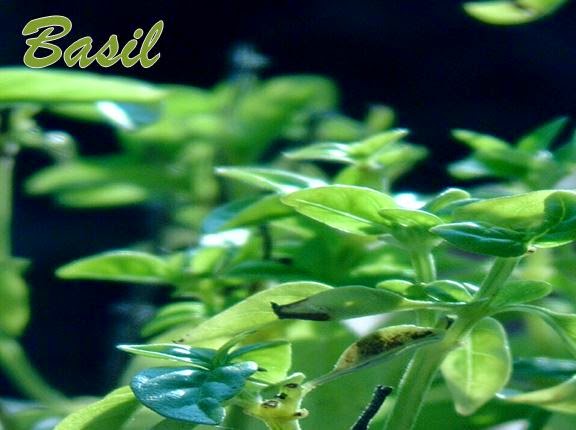
Basil


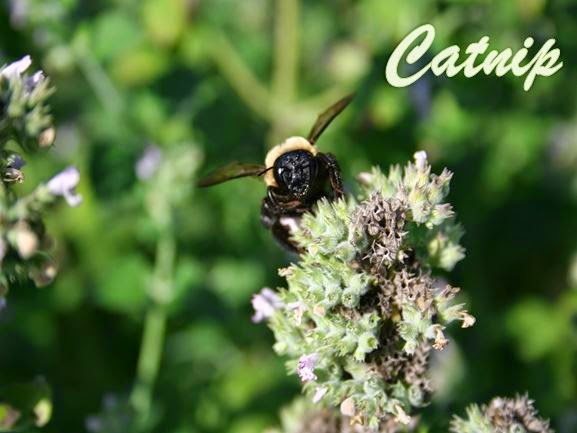
Catnip


Lavender

Some other plants you can consider using are Horesemint, Lemon Balm, Citronella, and Ageratum! Be sure to try this and tell us if it works!


5 Tips for Growing Succulents

succulents

Succulents are great plants to grow inside and out. Not only are they easy to maintain, but they have a fun modern look as well! If you are looking for a way to add some nature to your home, take a look at these five tips for growing succulents like a pro!

  1. Look for the light!

Succulents need lots of light, so try placing or planting them on the south for  exceptional sun and warmth. If the leaves begin to change colour and turn brown or white, then it’s time to move them somewhere with less sun as it can be too overpowering.

  1. Don’t worry about the temperature.

Succulents can grow in temperatures anywhere between 50 and 90 degress. As long as they are given time to slowly adjust to the environment, they will flourish. So don’t worry about the temperature as long as you give your plants to gradually adjust to it.

  1. Don’t let them get thirsty!

During the summer months, succulents need more water due to the warm weather. Although the soil should never be soaked, it should stay damp. During the colder months, the plant will slowdown in growth and won’t require as much water. You can even cut the watering down to half!

  1. Choose superior soil.

Make sure the soil you choose is designed specifically for cacti. Succulents will thrive in this soil as it fast draining and helps the root system. This type of soil will give your plants the nutrients it needs!

  1. Only fertilize in the warmer months.

You can fertilize your succulents like you would any other houseplant during the summer months. These plants do not need fertilization during the winter months though, as your succulents are in “hibernation” and do not need the extra nutrients.

Growing succulents is very easy and even more enjoyable (Click to Tweet). They require a bit more care in the summer months, but they are pretty low maintenance during the winter months. These tips can work for growing succulents inside or out! Give it a try and see how easy it is to grow your own succulents!

Five Ways to Use Coffee Grounds in Your Garden

coffee

As an avid coffee lover, I am faced with one of the same problems as many of you. We finish brewing a pot of coffee and we are left with a pile of useless coffee grounds that end up tossed in the trash. But what if I told you, you could use those coffee grounds to make your gardening job easier (Click to Tweet). Coffee grounds can help your plants grow healthier and stronger. Here are five other ways to use coffee grounds in your garden:

  1. Make a worm farm.

Why do you want a worm farm? Well, worms will turn and aerate your soil for you which make less work for you! Take a bucket, add some soil, your coffee grounds and a few worms. Then add the mixture around your plants and the worms will do all the hard work!

  1. Pump up your compost.

Did you know coffee grounds are full of nitrogen? Nitrogen is what your compost needs to be its best. When you are done with you coffee grounds, simply put them in your compost bin and give it a good stir.

  1. Send your pests packing.

If you sprinkle coffee grounds around the perimeter of your garden and flower beds, pests won’t want to cross it. Slugs, snails, and other bugs won’t want to climb over the acidic mixture, leaving your gardens pest free.

  1. Make your own fertilizer.

To make your own fertilizer, add half a cup of coffee grounds per one gallon of water. Mix it well and allow the mixture to sit for about twenty-four hours and ferment. Pour the mixture around the base of your plants. The plants will love their homemade fertilizer and it is completely safe for children, and pets playing in the yard.

  1. Fight off fungus.

Coffee grounds are a great way to fight off various funguses that will grow on your plants. All you have to do is sprinkle the ground directly into your soil. As the grounds break down in the soil, it will help fight various molds and fungus that could be fighting your plants.

Coffee is my daily pick me up, and now it can be the same for your plants. Try using coffee grounds in your garden and see what results it gives!

19 Ways to Prepare for Your Garden for the Spring in the Dead of Winter

startplanningnow

It might be hard to think about gardening when the wind is blistering and the snow is blowing, but that doesn’t mean you can’t! The cold weather is the perfect time for planning for the spring!

If your anything like I used to be, you’re probably thinking you can just grab a few packs of seeds from the local store, put them in the ground and hope for the best, but if you want your garden to be successful, and reap rewards in the early months of the year you need to do a little planning (Click to Tweet). Here’s how…

In the fall before it freezes:

  1. Remove and discard the dead parts of plants, but don’t stick them into the compost. This will cause weeds to sprout up wherever you use the compost in the future.
  2. Put Mulch eight inches deep over any plants that might not handle the cold very well, including over-wintering vegetables such as carrots, so they will be alive still in the spring.
  3. Make sure all your garden beds are composted or mulched.
  4. Clean up, maintain and store your garden tools and equipment properly. Make note of any tools that might need to be replaced. If any of these tool need repairs, take them in to be fixed.

Start planning:

  1. Order seed catalogs. There are multiple good catalogs from different companies so go ahead and order a few! Here’s a hint! If you want to save the seeds from the plants to grow new plants in the future, you will want to buy heirloom varieties.
  2. Decide if you want to use cold frames or another technique to lengthen your growing season. If so, be sure to plan and build accordingly.
  3. Start by diagramming and planning what you want where. Once you have a general plan with your vegetable garden, herb garden, annuals, perennials, bushes and trees planned out, it’s time to start getting more specific.
  4. Be sure to check the viability and test germination of any seeds you have on hand.
  5. When you’re planning, start with the plants that take the longest to mature and will be there the longest – the trees! Next add the bushes, then the perennials including any herbs, then the annuals including the vegetables and lastly any potted plants.
  6. Ask yourself these questions for the trees, bushes, perennials and annuals:
  7. Do you want to plant any new ones?
  8. What kinds?
  9. How will planting these affect the plants you’ll be putting nearby? If you are planting a tree that gets really wide, you won’t want to plant bushes or anything long-lasting near it, but annual flowers would be great and provide a nice pop of colour!
  10. Are there any other plants that cannot coexist with these plants?
  11. What plants do really well around these plants?
  12. Where do you want them in on your land? You may realize that you might want your vegetable garden near the driveway, but you might want to put some bushes between your garden and your teenage driver.
  13. Now the fun part! Start picking out what you want!

Here’s some additional guidance on picking plants:

  1. 1 Decide what you are looking for and why. I like the unusual varieties of common plants, but you might appreciate your traditional plants as well.
  2. Don’t forget to check which grow zone you live in. Your country, province or state extension service might have more detailed information available, or ask at your local nursery to get the best information.
  3. Think about what you’ll actually use and eat. There are really no reason buying eight rosemary plants, if you don’t like using rosemary in your cooking.

Here are some steps to take mid-winter:

  1. Look at the weather: is it an unusually cold or snowy winter? Or is it mild? If it’s not overly cold or snow, then you probably don’t need to do anything extra to your plants. But if it is really cold or snowy then you might want to protect your plants better.
  2. Take advantage of the increased visibility due to the plants dying or being dormant and take a good look at your garden. Are there any areas of erosion? If so, you can make a project for the spring and begin to research and plan on how to best fix it.
  3. Can you see roots damaging any walls, foundations, pathways or anything else? In the spring have a professional take care of any problematic roots. Do you research now to find a good service and ask for referrals from friends and neighbours?
  4. Look at where the snow and ice melt first and where does it last? This will give you an idea of what spots naturally receive more sunlight.
  5. It is finally time to start planting – even with the ground frozen rock-hard! Start your early season plants indoors. In four to six weeks, you can put them in the ground and start the next group of plants inside. A grow zone map can help you determine what to plant and when, as the weather begins to warm up.

I hope these tips help you get excited for your garden for next summer and you’ll have a great growing season! Enjoy the planning and the planting!

Twenty Terrific Plants for Winter Landscapes

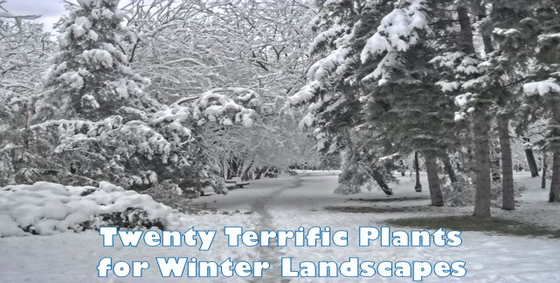
twentyterrificplantsforwinterlandscapes

It is very difficult to imagine what a yard would look like in the winter, but the winter brings an entirely new landscape with colours, textures, and shapes that cannot be seen at any other time of the year. What if the coming winter meant five months of beauty without staking, pruning or watering a single plant? (Click to Tweet)

Here are twenty plants that will keep a low profile from spring to fall, and then reappear when the cold weather arrives!

Color: When the world fades to shades of white and grey, these shrubs show their true colors.

Shrubby Dogwood (To guarantee bright color each winter, prune dogwoods each spring to remove some older branches and allow more new growth. The newer branches show better color.)

  • Cornus alba ‘Sibirica’ (coral-red branches)
  • Cornus alba ‘Bud’s Yellow’ (yellow)
  • Cornus sanguinea ‘Midwinter Fire’ (orange-red)

False Cypress

  • Chamaecyparis pisifera ‘Filifera Aurea’ (yellow)
  • C. pisifera ‘Boulevard’ (blue)

Creeping Juniper

  • Juniperus horizontalis ‘Wiltoni’ (blue)
  • J. horizontalis ‘Mother Lode’ (yellow)

Holly

  • Ilex x meserveae ‘Blue Angel’ (blue-green leaves, red berries)
  • I. x meserveae ‘Golden Girl’ (green leaves, yellow-orange berries)

Berries: If done right, birds will enjoy these berries until late winter.

  • Winterberry (Ilex verticillata)
  • Firethorn (Pyracantha coccinea)
  • Beautyberry (Callicarpa dichotoma)
  • Viburnum (Viburnum dentatum, V. dilatatum, V. lentago, V. opulus, V. rhytidophyllum and V. trilobum).

Texture: Shiny bark mirrors winter light and grasses rustle in the wind.

  • River birch (Betula nigra)
  • Paperbark maple (Acer griseum)
  • Bamboo (Nandina domestica)
  • Grasses (Miscanthus sp., Panicum sp.)

Shapes: Different sculptural forms are pleasing to the eye and create a foil for frost and snow.

  • Boxwood globe (Buxus)
  • Irish yew (Taxus baccata ‘Fastigiata’)
  • Harry Lauder’s Walking Stick (Corylus avellana)
  • Flowering Dogwood (Cornus alternifolia, C. florida and C. kousa)

Winter Yard Work Checklist

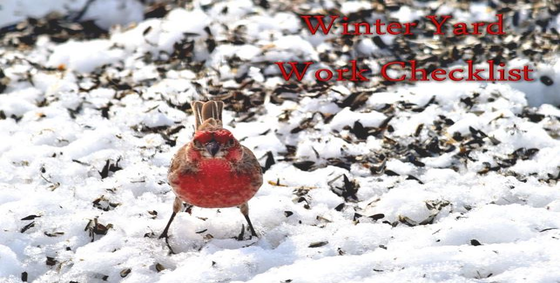
winteryardworkchecklist

During the winter months, landscape and yardwork is usually the last thing on the minds of homeowners. But during these times are actually the most ideal times to renovate the lawn and eliminate the brown spots and crab grass left over from last summer.

Lawn Renovation

Lawn renovation begins with raking to the open ground to expose the soil so that new seeds can germinate. This should be followed by levelling the lawn to cover the lowest areas with new soil and then reseed the entire lawn if necessary or merely patch certain areas as required.

To ensure germination, add a good fertilizer and cover the seeds to protect them from hungry birds. Then wait for three to four weeks for the seeds to sprout. The advantage to doing this during the winter is that nature provides enough water to germinate the seeds, whereas it is obligatory to water the areas during other times of the year.

Crab Grass

Your grass is full of crab grass seed waiting to sprout in the spring, so you need to spray a pre-emergent during the last week of February, just before the temperature starts to warm up. You do not want to apply the pre-emergent any earlier than February because it could kill any new seeds that you have planted. Also, the chemicals are not as effective in the cold weather.

Pruning

Now is the time to begin pruning your trees, and your roses too! In order to improve the production of these plants, you must prune before they start to bud.

Flower beds

Take the time to remove the fallen leaves and blossoms to avoid protential fungus and molds from growing.

Planting

Planting bare-root trees and roses before spring arrives, is good because the prices are the best for new trees and bushes at this time of year.

Contact Landscape Professionals

Winter is the most ideal time to contact a landscape contractor about updating, remodeling, or totally reinstalling your yard. Most people typically wait until spring to make their initial calls, and often find that landscapers are busy and are even scheduled in advance all the way to March. Plan ahead to get the best services and prices of the year. (Click to Tweet)

Winter Landscaping Tips

WinterLandscapingTips

As the winter months approach us very quickly, the plants are asleep and their colors disperse, leaving a variety of shades of white and gray. It’s too cold and icy to plant anything in the Winter, but with careful planning in the spring, summer, and fall, you can have a beautiful landscape that shines in the peaceful season. (Click to Tweet)

Here are six winter landscaping tips that will make you love your yard in every season.

  1. Focus on bark. Deciduous trees lose their leaves in the wintertime, which leaves just their branches and trunks. Planting ornamental trees like dogwoods and birch trees, that have very distinctive texture and colour bark, will add some variety to your winter landscape.
  1. Include berries. Many trees and shrubs have berries that stay throughout the fall and winter, which will provide food for birds. Some examples are crabapples or holly with berries can be very beautiful within the snow.
  1. Don’t forget evergreens. Evergreens are wonderful in the winter landscape for several reasons. The first is that they add colour: not just green, but some are yellow, blue and all the colours in between. These trees are not only important for your winter landscape, but they make good focal points all year round.
  1. Rely on your hardscape. Winter is the best time to consider your hardscape. The solution to enhance your winter landscaping might not be a plant, but rather a trellis, a bench, an arbor or even a garden sculpture.
  1. Embellish your summertime containers. Window boxes, hanging baskets and winter-safe containers are all essential for winter landscaping. You do not have to spend money on other plants, just fill the containers with evergreen boughs of different colours, textures and interesting twigs.
  1. Stick with four-season perennials. There are some perennials that have evergreen shrubbery: ornamental grasses, hellebores, even dianthus with its beautiful low-creeping foliage. These are great for winter landscaping. Just make sure you read the plant label and find out if the plant has foliage in the winter, so you can enjoy it year round.