Save Money on Lawn Care

save-money

With the warmer weather quickly approaching, many people are beginning to think about their yards… and why wouldn’t they? Warm weather means going for walks, playing outside, picnics and barbeques! So how can you get your lawn ready for all these fun activities without spending an arm and a leg (not to mention all the time) on the grass?


Well, the good news is that we have the answers for you and they are easy to do! All you have to do is follow these four easy steps and you’ll have the perfect yard just in time for all the outdoor fun!


Grass Seeding         

The idea of seeding your lawn might feel silly and maybe a bit pointless, but there are a few reasons why you should reseed your yard – even if you have grass already growing. When was the last time you or a previous resident planted grass? If you think decades may have passed, there is a possibility that the species of grass could be weak due to disease or more dependent on water. Not to mention that by reseeding you can put an end to those unsightly brown spots and bald areas.


Watering and Fertilizing

Setting aside a time to water your lawn may be more important than you realize. Watering during the day will cause the water to simply evaporate and when done at night, it can lead to fungus, disease and a sick lawn. The best time to water is either in the dawn or between the hours of four and eight in the morning. Fertilizing is just as important as watering your garden; you should feed your lawn a slow-release fertilizer about every five to six weeks.


Lawn Aeration

As intimidating and difficult as it may sound, aerating your lawn is actually fairly easy and extremely beneficial to your grass. Simply rent an aerator, preferably commercial-grade and follow the instructions. This process will help the water reach the roots of your grass, ensuring you waste less water while your yard gets all the nutrients it needs! Not only this, but it also prevents compaction, allowing your grass to breathe and grow. Watch your grass grow greener and healthier!


Ideal Length

Most people cut their grass short because they believe they won’t have to mow as often and they will have a healthier lawn with fewer weeds. The truth is that the shorter you cut your yard, the more problems you will have. Taller grass needs less water and tends to grow thinker with will prevent weeds from growing. The taller grass shields the roots which allows for a longer root system and ensures that the water soaks deeper into the ground.

Landscaping Prep Steps

landscape prep

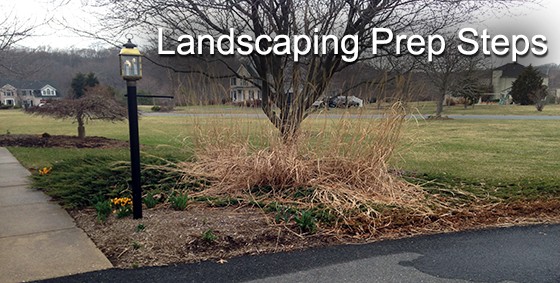
When planning to do a landscaping project, there isn’t much you – the homeowner – can do in preparation. But there are a few things that will need to be done before the landscapers ever set foot on your property.


Mark your gas, water, etc. lines
A few days before your landscaping projects begin, you will need to have some of the underground lines and wires identified. To do this, you will need to call each company and have someone come out to mark exactly where these lines are laid. You will need to call the:

– cable company
– gas company
– electrical company
– water company
– sewer company


By calling these companies and having them mark the lines, it will keep your project timeline on track and will allow your landscapers to spend their time doing the landscaping work instead of trying to sort this out themselves.


Remove clutter from the yard
This is probably one of the easiest, but most important tasks. It might be a no-brainer but its amazingly surprising how many people leave toys and tools all over their yard even on the day the landscapers arrive. It doesn’t have to be neat, it just has to be out of the way. If you do not have a space to store them, pile them on your porch or on your driveway.


Leave them space
If you are having trees planted, installing a bunch of hedges or if you are resodding your yard, then you need to be considerate of the distance your landscapers will have to park from your yard. They might have to carry trees/bushes or walk rolls of sod over a long distance. If you can shorten that distance by parking your vehicles on the street or out of the way, that will be a huge help to your landscapers.

February’s Chores and Tips

february chores and tips

Well the first month of 2016 just flew by! Here are some tips and to dos to take care of your landscapes and gardens for the month of February!


gardening banner

  • Shop for early spring flowering shrubs and vines, such as Carolina Jessamine, daphne, azalea, camellia, and early rhododendrons.
  • Order perennial plants and bulbs now for cut flowers this summer. Some of our favourite choices are phlox, daisy, dahlia, cosmos, aster, gladiolus, and lily.
  • Plant your bare-root vegetables such as artichoke, asparagus, horseradish,and rhubarb.
  • Plant your spring flowering perennials. Choose from alstromeria, bleeding heart, coral bells, campanula, euryops, and perennial dianthus.
  • Fertilize your spring -blooming flowers and fall-planted annuals and perennials. Wait to feed azaleas, camellias, and rhododendrons until after bloom; use an acid based fertilizer.
  • Be careful not to remove mulch from perennials too early. A warm day may make you think spring is almost here but there may be more cold weather yet to come.


Back Yard

  • If the soil against your house dries out under the eaves where rain rarely reaches, water well during a thaw to prevent loss of plants. Remember that plants require water during the winter to replace water lost due to wind desiccation and lack of rain or snow.
  • Late winter is the time to prune many deciduous trees. Look over your plants now and remove dead, dying, or unsightly parts of the tree, sprouts growing at or near the base of the tree trunk and crossed branches.
  • If bird feeding has been a favorite activity this winter, order trees and shrubs which provide cover and small fruits for your feathered friends. Consider species such as crabapple and hawthorn which can help lure hungry birds from cultivated fruits, if planted on the opposite side of the yard.
  • Finish pruning cane berries, deciduous fruit trees, grapes, roses, and wisteria by midmonth.
  • Wait to prune spring -flowering deciduous ornamentals like forsythia and quince, and spring – flowering shrubs until after they flower.


indoor and storage banner

  • If you’re antsy to start gardening, you can grow micro greens and sprouts inside to reduce gardening restlessness.
  • Branches of forsythia, pussy willow, quince, spirea, and dogwood can also be forced for indoor bloom. Make long, slanted cuts when collecting the branches and place the stems in a vase of water. Change the water every four days. They should bloom in about 3 weeks.
  • Finalize garden design plans for the 100th time.
  • Remember to handle seed packets carefully. Rubbing the outside to determine how many seeds are inside can break the protective seed coats, thereby reducing germination.
  • Check your stored bulbs, tubers, and corms. Discard any that are soft or diseased.
  • Repair and paint window boxes, lawn furniture, and other items that might need it, in preparation for outdoor gardening and recreational use.

Planning an Herb Garden in January

herb garden

It’s January and many of us (including me) have made new year’s resolutions to become more fit and healthy in 2016. Reducing stress, getting more exercise, eating less salt and eating more fresh produce are all great goals. So how can gardening help maintain these goals? Well, an herb garden is a good place to start. Fresh herbs are a great substitute for salt and adding them to salads and vegetable dishes makes fresh produce so much more appetizing – love the flavors and textures of freshly-picked herbs! A small outdoor herb garden is very manageable and provides moderate exercise without backbreaking work.


Studies have shown that gardening reduces stress. There’s a sense of accomplishment when home-grown herbs are picked and used straight from the garden. Additionally herbs are full of vitamins and if you grow your own, you can avoid pesticides and herbicides. All very positive, so how do I start an herb garden? Well, January is a good time to start, take a look at the garden plant catalogs and start researching and choosing your herbs. You can order seeds and start your own plants or, later in the spring, buy small seedlings from garden centers to transplant into your garden.


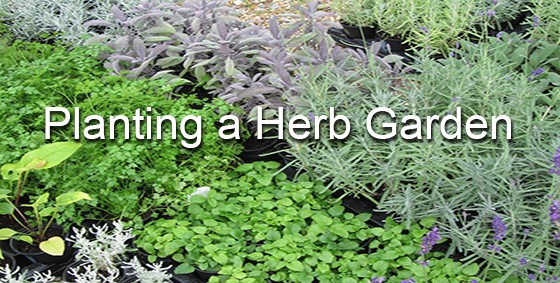
After the last frost date, select a spot in your yard that is fairly flat and gets about 6 hours of sun, this would be considered a full-sun location. (most herbs thrive in a sunny location, but many will tolerate part-shade). Plan the size of your herb bed based on the quantity of plants and how big the plants grow. It’s a good idea to get the soil tested and then add any amendments to improve the soil. To define the edge of the herb bed and to contain the soil, mulch and plants, consider adding lawn edging – choose a style that suits your garden aesthetic.


Some herbs such as mint and tarragon have underground roots that spread quickly and grow all over other plants. This can become a problem requiring the mint or tarragon to be dug up, including all the roots – a chore no one wants to do. To avoid this, mint or tarragon are often planted in tubs or large pots. If they are planted in the ground, they can be encircled with lawn edging or a bottomless bucket that will contain the roots and stop them spreading.


Here’s a selection of easy-to-grow, delicious herbs and their uses


  1. Mint. There are many different varieties of mint, each with its own flavor and fragrance. It grows well in semi-shade. Mint gives a kick to a green salad and a refreshing zest to iced-tea. And of course we mustn’t forget that summer beverage – the Mint Julip!


  1. Chamomile. This herb makes the classic, relaxing chamomile tea. The tea is made from the flowers, use them fresh in the summer and dry them for winter use. This tea is a great, natural stress-reliever. Chamomile and mint are a great combination for a tea.


  1. Chives. These plants have a very mild onion flavor and are tasty when sprinkled on salads, eggs and potatoes. They have attractive pink, edible flowers in late summer that can be used as a garnish. Garlic chives have a slight garlic taste.


  1. Parsley. You can choose curly or flat-leaf varieties of parsley. This is an all-round useful herb that can be added to soups, stews and quiches. Also nice sprinkled on fish, meat and vegetables.


  1. Borage. This herb has the most beautiful tiny, blue, edible flowers. They look so pretty floating in summer drinks such as lemonade or punch. A must-have when making Pimm’s – the summer drink loved by the English horse-racing set. If you are interested in encouraging bees, this is the ideal plant – bees love the flowers.


  1. Cilantro. This tasty herb is used in Mexican cuisine and it’s fun to snip the leaves, chop them and add them to salsa or guacamole. Also used in Indian dishes.


  1. Basil. To me, summer isn’t summer without fresh basil. There are many varieties of basil, with different leaf-colors and flavors. This is another very versatile herb that can be used in many different dishes including italian-style tomato sauces.


  1. Summer Savory. This is one of my personal favorites, it has a subtle, smoky flavor and I use it in place of any other herb. Very easy to grow and pollinating insects adore the tiny flowers.


Starting a herb garden need not be a major challenge if you restrict yourself to a few herbs you’ll use most. If you don’t have a yard that’s not a problem, many herbs do fine in pots or in window boxes. Finally this is a great way to introduce kids to the process of gardening, harvesting and cooking. Here’s to keeping those resolutions in 2016!


Lawn Edging for Tree Rings

tree rings

Using Lawn Edging for Tree Rings

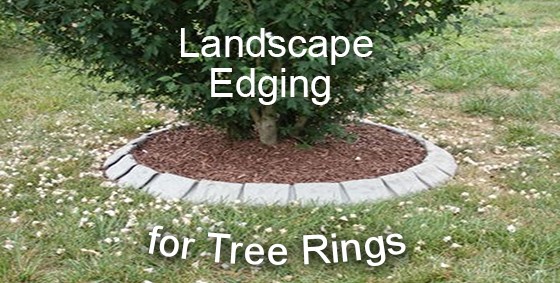
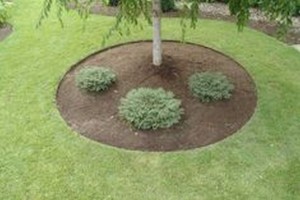
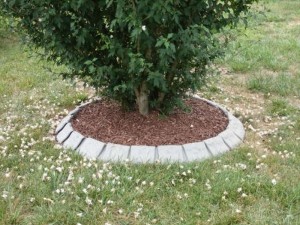
Lawn edging is used to create tree rings around the base of trees, usually when the tree is planted in a lawn or paved area. The edging is installed in a circle around the tree and the area between the edging and the tree trunk is covered with a layer of organic mulch. The lawn edging provides a nice neat, crisp edge which suits the style of many gardens, especially in urban areas.


AluminumEdging8

Installing Lawn Edging around Newly-Planted Trees

Tree rings using lawn edging or other material are best added to trees when they are first planted. When planting a tree, remove grass and weeds and add fertilizer as needed. Make sure the tree is planted at the correct grade with the top of the root ball one or two inches above the surrounding grade. The roots will settle after planting and this prevents rain water pooling around the trunk. Do not stake the tree because when the tree is allowed to move with the winds, it develops stronger anchor roots. After planting the tree, install the lawn edging at the outer edge, or just beyond the edge of the root zone or drip line (the area below the tree branches). After installing the edging, add a layer of mulch no more than two inches deep inside the edging to the tree trunk, this will conserve moisture and nutrients and stop weeds geminating. If the mulch is thicker than two inches deep, it will prevent water from reaching the tree roots and the soil will become too dry. Take care that no mulch actually touches the tree trunk because this may enable insects or disease to attack the tree. There are several benefits to installing landscape edging as a tree ring. Not only does it look good, but tools such as weed-whackers, manual edgers and lawn mowers are not used close to the tree trunk where they can damage the bark, cut the roots, break branches or compact the soil. The lawn edging also stops lawn grass from invading the soil under the tree where it competes with the tree for nutrients and moisture.


2005_0915Installation0020024

Installing Lawn Edging around Mature Trees

It is possible to install lawn edging as a tree ring around a mature tree but this should be done with extreme care by an expert in the field such as a professional landscape gardener or arborist. Be sure to choose a professional who has previous experience and follow up on their references. This is because there are some risks to installing tree rings around mature trees. For example the roots or bark could be damaged or branches broken. In the worst case scenario, the tree could die and you could lose a valuable mature tree that is impossible to replace. The landscape professional will remove turf grass from underneath the tree in a circular shape, the edge of the circle may well extend beyond the edge of the root zone or the drip line (the area below the tree branches) so it could be a very large area, depending on the size of the tree. After the turf is removed, edging will be installed, followed by a layer of mulch.


Tree rings can improve the appearance of your yard or garden and also contribute to the long-term health of a tree. Be sure to follow the correct steps to prevent damage to the tree and hire an expert when working with mature trees or valuable specimen trees.

6 Factors to Consider When Hiring Snow Removal Companies

snow removal

When hiring a commercial snow removal company, there are many different factors to consider. Although it might be easy to just call the first company you come across, you will want to ensure that you get excellent service for what you pay.


  1. Get a snow removal estimate that matches your needs.

Each company offers a variety of prices and services. Make sure you do your research to make sure you find a company that is offering what you need for an affordable price. Do not forget to ask about special fees – especially those based on unique conditions such as deep snow, or additional services such as de-icing or detailing.


  1. Ask for references and check for accreditation.

Make sure that the company you hire is reliable, insured, and has a reputation for offering excellent customer service. Even though large commercial companies may have great reputations, it is not a bad idea to check references to make sure that you receive the most exceptional services. You should also ensure that the company is committed to safe operating practices by checking their company safety record.


  1. Ensure clear communication and clear contracts.

Whenever you hire a contractor or sign a written agreement, you will want to carefully review all contracts to make sure all the services you have discussed are included and priced appropriately. Look to see how the company will document work in progress and what contingency plans they have in place for if problems were to arise. You should feel comfortable with the company you have hired and should know the best way to contact them.


  1. Hire a Risk Manager, not just a snow plow company.

Consider the level of service that you need and make sure that the company can provide those services. Does the company you are considering include a zero tolerance ice management if that’s one of your goals? Do they treat sidewalks and parking lots before it snows to stay ahead of the storm? You want to ensure that the company you hire has a plan and is prepared for every possible winter condition.


  1. Make sure that the snow removal company is insured.

A low cost snow plow option might be tempting, but companies that have adequate insurance can cost more than those without. Just as you make sure your business has proper insurance coverage, make sure your commercial snow removal company does as well. The risks associated with snow and ice are very high and not worth taking the added risk of a lower cost contractor.


  1. Know your snow and ice contactor’s emergency snow removal plan.

The best snow and ice contractors have a detailed plan set in place for an assortment of snow and ice events. They have specific steps planned for a light snow fall, a blizzard, ice storms or any other snow happenings that might cause power outages or reduced resources and man power. Regardless of what the storm might look like, a company with a plan will have the equipment ready to go, routes scheduled and a plan in place to keep their customers informed and their sites clean.


Is there any other factors that you would recommend be considered before hiring a commercial snow removal company? Share them in the comments below!

January’s To-Do’s and Tips

January

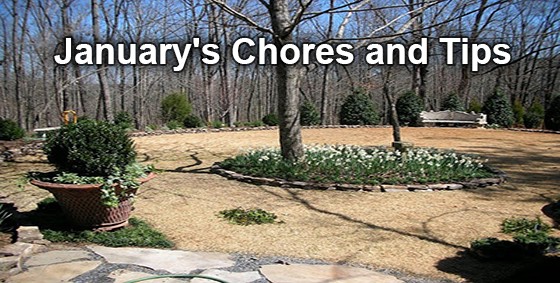
Happy New Year! I trust you are having a great new year and you’ve started creating your New Year Resolutions. Why don’t you add “making your landscaping a priority” to your resolutions list?


Here are some tips and to dos to take care of your landscapes and gardens.

gardening banner

  1. Browse through the many different seed catalogues, compare varieties and try not to get carried away.
  2. Figure out what your family eats the most from the store, make lists of your most purchased produce and use this to help figure out what to grow.
  3. Plan and design your garden. Make sure that your crops are adequately rotated from the previous growing season.
  4. Start your onions, celery, celeriac, leeks and slow-growing herbs like rosemary and sage at the end of the month.
  5. Start a frozen compost pile. For tips on how to do this, see our article: Five Tips for Winter Composting. http://www.yardproduct.com/blog/5-tips-for-winter-composting/


Back Yard


  1. Be careful when spreading salt to melt the ice on walks and driveways to avoid damaging nearby shrubs. Consider using sand or sawdust instead.


  1. Brush the snow from evergreens as soon as you can after a storm. When using a broom, brush in an upward sweeping motion. Serious damage may be caused by heavy snow or ice accumulating on the branches.


  1. When pruning large limbs, always undercut first. To do this, cut from the bottom up, one-third of the way through the limb, then finish by cutting from the top. The undercut keeps the limb from splitting and breaking off, which could damage the trunk and become an entryway for insects and diseases. Make sure to not cut flush to the trunk, the collar or the enlarged base of a branch as it produces hormones that help heal wounds.


  1. To create easier lawn maintenance, eliminate the hard to mow spaces. To do this, you need to eliminate acute angles in beads and borders. Combine single trees or shrubs into a large group that is connected with ground cover. Put the bird bath in your flowerbed or surround it with ground cover.


indoor and storage banner

  1. Check your indoor plants closely for insect infestations. If you receive any plants as gifts, quarantine them until you are positive they are not harboring any pests.
  2. Your house plants and holiday plants should not be placed on top of your television (especially if you have a flat screen)! This location is too warm and in most houses, it is too far away from your windows to provide adequate light.
  3. During the winter, most houses are too dry for house plants. You can increase your humidity by placing plants on trays that are lined with pebbles and filled with water. If you heat your house with wood, keep a pot of water on the stove. The added moisture will make your home healthier for both you and your plants!
  4. If you have some extra down time this winter, paint the handles of your garden tools red or orange. This will help preserve the wood and make the tools easier to locate next summer when you lay them down in the garden or on the lawn.

Using USDA Climate Zones to Choose the Correct Plants for Your Garden

Capture(1)

When choosing plant material for your yard or garden, it is important to choose plants that will thrive in your local climate. For example, you wouldn’t want a plant that will die during the cold winter temperatures or a shrub that needs plenty of moisture if you live in a hot, dry area. This is where USDA Climate Zones come in, the zone information can help you choose the right plant for the right location.


What are USDA Climate zones? The United States Department of Agriculture divides North America into 11 zones. The zones are based on the highest and lowest temperatures in a geographic area. The coldest zone is Zone 1, the warmest zone is Zone 11. Many plants will thrive in multiple zones because they are adapted to grow in a range of temperatures or conditions.


How do I find information about the climate zone for my area? The United States Department of Agriculture publishes an online map for all North American states here http://planthardiness.ars.usda.gov/PHZMWeb/ At the same site, you can also find more detailed information about specific states. Just select the name of your state from the list and find your county or nearest city – then refer to the key to see which zone you are in. Make a note of your zone, then when choosing plant material, make sure the plants are appropriate for your zone.


How do I know if a plant is suitable for my zone? At garden centers or stores, take a look at the label on the plant, shrub or tree. The label should say include the zone number(s). Your local garden centers or stores will most likely stock plant material for your zone, if in doubt ask them. If you are buying online, the description of the plant material should include the zone number(s). Zones can be used in reference to any type of plant, vine, shrub or tree.


Is there anything else I should consider, apart from climate zones? Yes, there are other factors that will determine whether the plant material is suitable. For example, soil type, soil moisture, wind exposure, salt (from de-icing or seashore), rainfall, humidity, day length, amount of shade, and elevation (above sea level) will all play a part.


Within your yard or garden, ‘microclimates’ can exist and they can impact your plants(s). So what is a microclimate? A microclimate is a small area where the climate is different from the surrounding area. For example, if an area is shaded by a tree, the microclimate may be dry-shade. If an area is next to a pond or creek, the microclimate may be damp or wetland. If an area is behind a row of shrubs that act as a wind-block, the microclimate may be warmer in winter and cooler in the summer. Observe your yard or garden throughout the seasons and you will become aware of microclimates where plants thrive or don’t grow so well. In addition to the climate zone, you can include any microclimates when choosing plant material.


With a little knowledge, it’s fairly easy to select plants, shrubs or trees that will grow well in your yard or garden. Start with your climate zone and take into consideration any micro climates. Another tip is to take a walk around your neighborhood and see what grows well locally – chances are that plant will do well in your yard too.

Winter Protection for Shrubs

winter plants

Winter weather can damage or kill shrubs and trees. Winter sun, wind and cold temperatures can dry out evergreen foliage and make it turn brown and die back. It can also damage twigs and dormant buds. The weight of snow and ice may break branches. Salt used to remove ice is not good for shrubs and trees. Wild animals adapt to winter food shortages by eating wood, bark and evergreen foliage in the winter. However it is possible to protect your garden shrubs and plants during the winter so that they will be in good shape come the spring. Here are a few tips to consider.


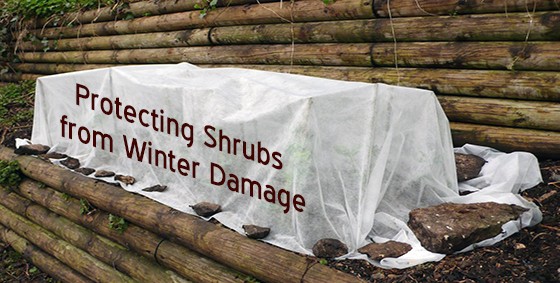
Winter sun and cold temperatures can make evergreen foliage turn brown and die back. There are a couple of things you can do to prevent this. First consider planting evergreens in places where they are not exposed to a lot of high winds and winter sun. After Christmas, place your old (natural) Christmas tree or evergreen branches around the shrub, this will act as a wind break.

Another option is to wrap the shrub in burlap or create a burlap barrier. Finally, make sure to water the shrub during the growing season, a well-hydrated shrub is less susceptible to drying out in the winter. Add a temporary layer of 6″ mulch (leaves, straw or wood chips) around the base, this keeps moisture in and prevents frost damage to the roots.


The weight of snow and ice can break branches or bend them away from the trunk. This can be prevented by wrapping the shrub with string or twine so that the branches are held in place even through heavy snowfall or ice storms. Remove the string promptly in the spring to allow the shrub to grow normally. Salt that is used to maintain roads in winter will damage the foliage or seep into the soil, damaging roots. If possible do not plant shrubs near the edge of the road or where salty water will drain. Existing shrubs can be protected with a burlap screen. Fortunately there are many trees, shrubs and plants that are resistant to salt and these would be a good choice for a roadside area.


There are several wild animals that are active in the winter months and when food is scare they will eat foliage, branches, twigs and bark that they ignore at other times of the year. It is important to protect the trunk from the ground up as well as higher branches/twigs that deer can reach. Mice and rabbits will gnaw the bark off the trunk and this can kill the shrub. To prevent this, wrap the trunk in chicken wire or metal mash fabric. Deer will eat small branches and twigs. If it is a low-growing shrub or tree seedling, they will eat it to the ground and kill it. To stop deer damage, either protect the shrub with a physical barrier such as a fence or burlap screen or use a chemical deer deterrent. Chemical deterrents need to be re-applied throughout the season after precipitation. Some people have had success using anti-bacterial soap hung from branches (inexpensive and lasts longer). Another thing to consider is choosing deer-resistant shrubs that deer avoid eating.


It is possible to prevent damage to shrubs and small trees during the winter. Plan for prevention by planting the right shrub in the right place and have your equipment and materials ready to use. Each winter, you will learn a little more about the unique requirements of your garden or yard. These preventative steps will ensure your shrubs are off to a good start the following spring.

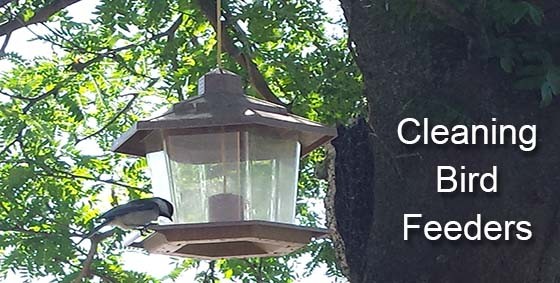
How to Clean Bird Feeders

cleaning bird feeders

At this time of year we start planning to feed our backyard birds. Before putting last years bird feeders out, it’s a good idea to clean them because this will help keep the garden birds healthy.


It’s easiest to clean bird feeders outside, fill a bucket with hot water and add some dish detergent. Wearing rubber gloves, wash and scrub the bird feeder with a brush to remove any dirt and old seeds. Put the dirt and debris in the garbage.


Next, disinfect the bird feeder. Fill a bucket with hot water and add household bleach. (One part bleach to nine parts water). Submerge the bird feeder for about five minutes then rinse with cold water and leave it outside to dry. When it’s completely dry it’s ready for use.


Repeat the cleaning process every two months during the feeding season. When cleaning the feeder, sweep up old bird seed and hulls that have dropped to the ground and put them in the garbage. It takes some time and effort to keep the bird feeders clean but it’s worth it because we appreciate those beautiful backyard birds!