Steps

1. Lay out area to be defined. Marking paint, string or a garden hose works well. 1
2. Spade a vertical wedge in ground approximately 4" or 5" deep as required per size being installed. 2
3. Begin placing edging in trench RADIUS SIDE UP with stake pockets to the INSIDE of bed area. While installing, place edging deeper than desired and lift with spade to desired level when job is complete. 3
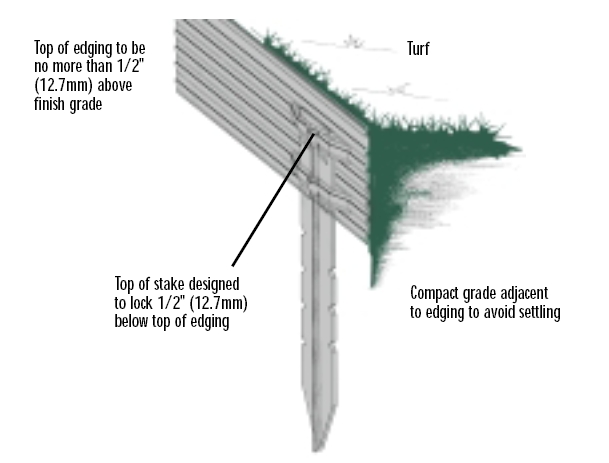
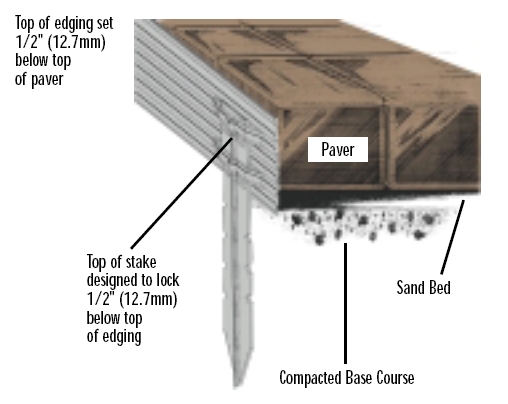
4. Hammer stakes below top of edging. 4
5. To ensure straight lines, stake and backfill edging continuously, compacting both sides to ensure the finish grade is approximately 1/2" below top of edging. 5

Helpful Hints

  • - End Stake Adapters: Use at all start/stop points to secure edging and to splice cut pieces together.
  • - Corners: Cut edging from bottom to approximately 1" from top with hacksaw and bend to desired angle.
  • - Grade Changes: Cut "V" shape notch in bottom of edging and bend to accommodate grade
  • - Tree Rings: Cut locking system at final connection and use end stake adapter to splice pieces together.


Guarantees

Quality Service

Affordable Pricing

Free Shipping

Direct Delivery